Canvas Instructions 1.3

Here you will find step by step instructions on how to setup your service in Canvas with LTI 1.3.
The Peregrine Global Services LTI Tool can be setup in Canvas with LTI 1.3 dynamically or manually. It is highly recommended to use dynamic registration. Depending on the version of your LMS, these instructions may be slightly different.
Dynamic Registration
1. As the LMS Administrator, log in to Canvas and select Admin from the left navigation.
2. Click Developer Keys from the inner left navigation.
3. Click + Developer Key and then + LTI Registration within the drop-down.

4. Enter the “Dynamic Registration Url” provided to you by your Peregrine Global Services’ representative.
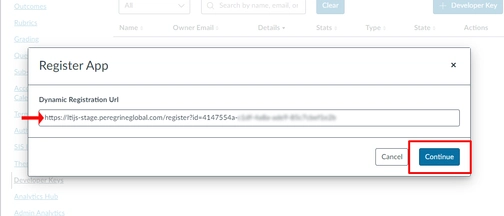
5. Click Continue
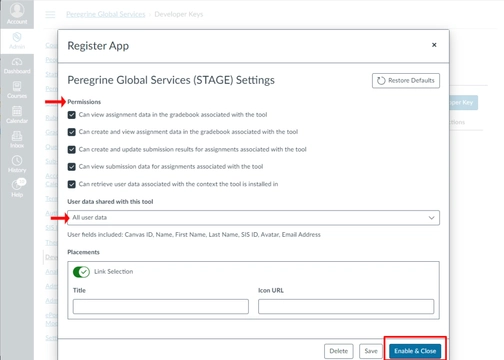
6. Confirm the “Permissions” and “User data shared with this tool”.
All permissions will be checked by default which allows Peregrine Global Services to post a grade to your gradebook.
Note that these permissions can be altered at any time.
7. Confirm the “Placements” where you would like this tool to appear.
Note that these placements can be altered at any time.
8. Click Enable & Close
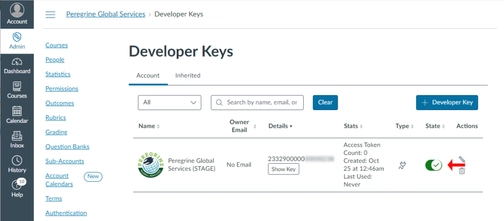
9. Verify the External Tool has been added to your account.
10. Ensure the “State” is enabled.
11. Copy the numerical Client ID shown in the “Details” column. You will use this to add the App to your account/sub-account settings.
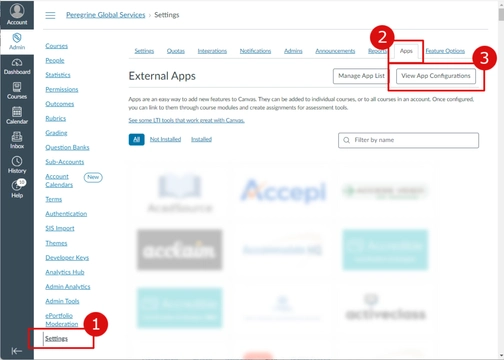
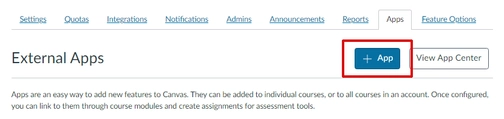
12. Navigate to Settings in the left-hand menu and click on the Apps tab.
13. Click View App Configurations.
14. Click + App.
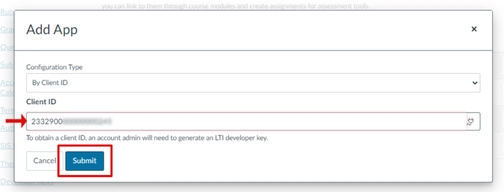
15. Select “By Client ID” for your “Configuration Type”.
16. Enter the numerical Client ID for the newly registered Peregrine Global Services tool.
17. Click Submit.
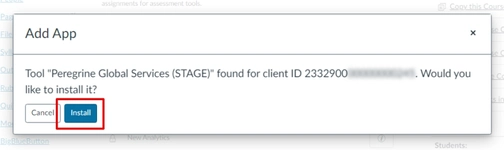
18. Upon confirmation, click Install.
The setup is now complete and you can now add a Peregrine Global Services’ resource as an assignment in Canvas.
Add a Peregrine Global Services’ Resource to Canvas
1. Select Courses from the inner left navigation, and then select Assignments.
2. Click the + Assignment button.

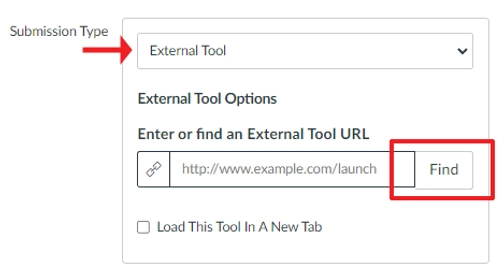
3. Enter the appropriate properties for this assignment and then scroll to the “Submission Type”.
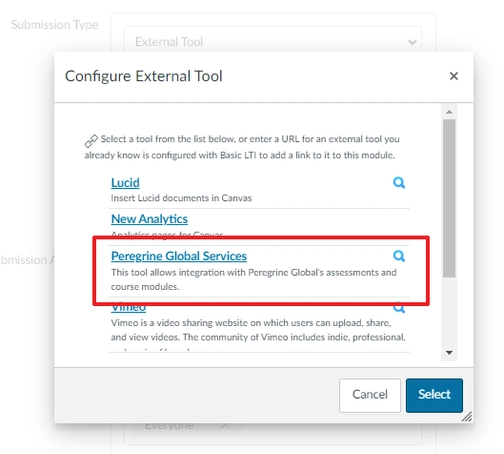
4. Select “External Tool” as the “Submission Type” and click Find.
5. In the External Tool configuration dialog, look for the Peregrine Global Services App you just installed.
6. Select the App.
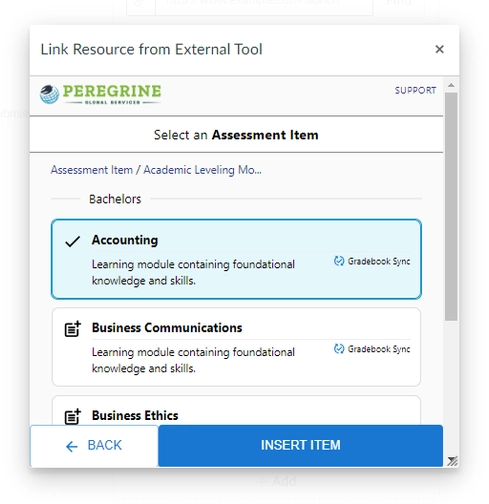
7. Upon a successful Deeplink launch, you will be presented with your available resources from Peregrine Global Services. Select the desired resource you wish to integrate within your course.
8. When selected, click INSERT ITEM.
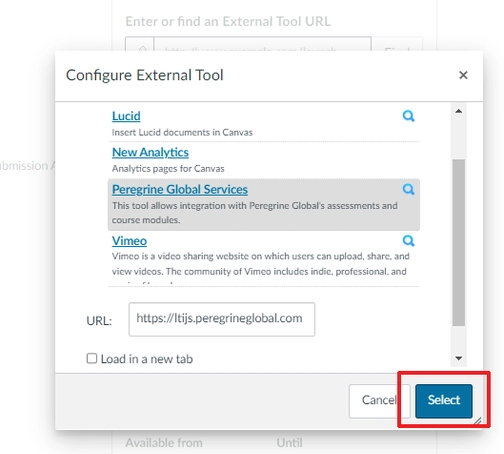
9. You will be returned back to the External Tool configuration dialog.
10. Click Select.
The integration of your Peregrine Global Services’ resource as a course assignment should now be complete.
Do you need further assistance or have more questions? Please visit our Faculty Support page and fill out a request form for our client engagement team.